My Experience Installing Windows Subsystem for Linux
Learning Linux is important for progressing in cybersecurity. At first I was looking into setting up a virtual environment on my Windows PC to run Kali Linux. I didn’t know a subsystem could be set up in Windows to run Linux.
What is Windows Subsystem for Linux (WSL)?
Windows Subsystem for Linux (WSL) enables you to run a Linux environment on your Windows machine WITHOUT the need for a separate virtual machine or dual booting.
According to What is the Windows Subsystem for Linux?
“WSL 2 is the default distro type when installing a Linux distribution. WSL 2 uses virtualization technology to run a Linux kernel inside of a lightweight utility virtual machine (VM). Linux distributions run as isolated containers inside of the WSL 2 managed VM.”
Also, WSL is faster and better for simple Linux command-line tasks. For beginner learning purposes, this would suffice for now.
If you are more interested in watching a video tutorial on the process, you can check out “Windows Subsystem for Linux (WSL) Tutorial & How To”
Below are the steps I used.
Step 1: Enable Windows to run WSL
1. Control Panel > Programs > under ‘Programs and Features’ > click 'Turn Windows features on or off'.
2. In the Windows Features window pop-up > click the checkboxes next to ‘Virtual Machine Platform’ AND ‘Windows Subsystem for Linux’
3. Click ‘Ok’.
The computer will need to reboot to apply the changes.
Possible issues you may encounter:
• Need Windows 10 or higher with update 2004 or higher.
• GPU issues (ensure hardware virtualization is enabled).
In Task Manager > click the CPU tab > Virtualization status should show ‘Enabled’.
If not, access the BIOS settings and enable Virtualization Technology
If you are unfamiliar with how to do so, check out the video 'How to Install Kali Linux 2024 On Windows 11 Using WSL With GUI' below:
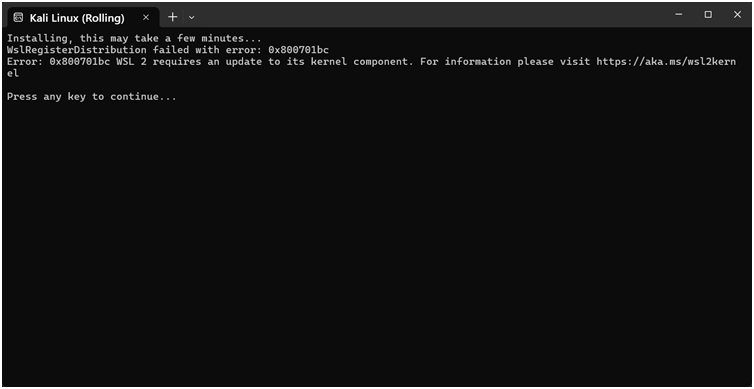
Step 2: Upgrade to WSL 2
A problem I encountered was that my machine had WSL and needed to be upgraded to WSL 2.
Step 3: Install Kali Linux
1. Go to the Microsoft store.
2. Search for ‘Kali Linux’.
3. Install the Kali Linux app.
Then I ran into the following error:
Error 0x80004005 when trying to register Kali Linux
This thread Error 0x80004005 when trying to register Kali Linux helped resolve the issue using these steps:
1. win + R -> regedit -> \HKEY_LOCAL_MACHINE\SYSTEM\CurrentControlSet\Services\LxssManager -> click the start option -> edit the value to 2.
2. Run powershell in administrator mode -> wsl –update.
3. Tried installing Kali Linux again and the result was successful.
All in all, the process had its hiccups, but I managed to install Kali Linux on WSL.


Comments
Post a Comment